How To Make Patches For Clothes At Home?
A plain shirt or a worn pair of jeans is easy to fix up with a patch you made yourself, but the first attempt may pucker, fray or peel in the wash. The type of garment used is usually the cause.This article covers how to make patches for clothes at home, with the fabric and attachment matched to what you’re wearing.

Key Takeaways
- The garment picks the method: Cotton and denim take a fused or sewn patch; synthetics and stretchy knits need a sewn patch over a stabilizer.
- Use a firmly woven base and a paper template: Cut with a ¼ in margin, keep letters above about ¼ in tall, and finish the edge with two passes of satin stitch.
- Press fusible web by the package: Test swatch, ona raise rather than slide the iron, and cool before checking the bond.
- We supply high-quality custom patches that you can personalize with your own artwork, colors, shapes, and backing options at a price that works for you.
Table of contents
-
How To Make Patches For Clothes?
-
How Can You Design Your Own Patches For Clothes?
-
How To Make A Fabric Patch At Home?
-
How Do You Finish And Attach Homemade Patches To Clothing?
-
How Do You Make DIY Patches On Shirts And Jeans?
-
How Do You Make Different Types Of Clothing Patches?
-
How Do You Make Specialty Patches For Clothes?
-
How Do You Make Several Matching Patches For Clothes?
How To Make Patches For Clothes?
To make patches for clothes at home, cut a firmly woven fabric or felt base to a paper template, stitch or paint the design, finish the edge with satin stitch or blanket stitch, and attach it by sewing, or with fusible web only on cotton or denim.
Home patches fall into four families:
- Fabric - a cut shape with a finished edge
- Embroidered - a design stitched onto a fabric base
- Decorated - paint, markers, beads, or sequins on a base
- Adhesive-backed - any of these with fusible web behind it
You need cotton or denim scraps, fusible web (a paper-backed sheet of heat-activated glue), a hoop, needles, thread, scissors, and an iron. The garment's fiber and stretch pick the family and the attachment before the design does. Our guide to ten ways to make patches catalogs the methods.
How Can You Design Your Own Patches For Clothes?
Design the patch on paper at the finished size. Cut it out as a paper template and hold it against the garment.
Keep the artwork simple enough for the method. Hand satin stitch and a home zigzag both lose lines thinner than about 1 mm and letters under about 1/4 in tall, the same floor we hold to in production.
Mark a 1/4 in margin around the artwork for trimming and edge finishing. Our guide to how to make custom patches covers choosing a method.
What Are Some DIY Patch Ideas?
Initials, flowers, stars, hearts, and geometric shapes survive a first attempt because each is one bold outline with one or two fill colors.
Patterned fabric does the design work for you: cut a circle from a plaid scrap, finish the edge, and the print is the patch.
Patches can be decorative or a cover-up over a stain or small hole, cut larger than the damage and stitched through sound fabric. Keep the ideas personal, since we don't reproduce trademarked insignia.
Want the stitched look without the learning curve?
Work with us to create custom embroidered patches from your own sketch, in any shape, thread color, and backing, with a free digital proof before production.
How To Make A Fabric Patch At Home?
A fabric patch is a cut shape of cotton or denim with a finished edge, made in six steps. New Mexico State University's 2014 appliqué guide recommends fabrics with a tight weave, naming poplin, denim, broadcloth, and gingham.
- Pre-wash the scrap so the patch and garment shrink together.
- Trace the template with a 1/4 in margin, marking the finished and cutting lines.
- Back a loose weave with fusible interfacing before cutting, as the NMSU guide advises.
- Cut on the outer line with sharp scissors or a rotary cutter.
- Add embroidery or decoration, or stitch before cutting if the design runs near the edge.
- Trim to the finished line and finish the edge with satin stitch, zigzag, or blanket stitch.
Fusible backing is optional when the patch will be sewn straight onto the garment. Add it only to iron the patch onto cotton.
How Do You Draw And Stitch Your Patch Design?
Transfer the template with a water-soluble pen, tailor's chalk, or a heat-erasable pen. Set the fabric in the hoop taut but not stretched, since a stretched base relaxes and puckers once the hoop comes off. Use three strands of floss, outline in backstitch, then lay satin stitches side by side so no fabric shows.
Straight stitches suit stems and letters; satin stitch suits fills under about 1/2 in wide, since longer stitches snag. Work with us to create custom embroidered patches to skip the practice hours.
Need a patch that presses onto cotton in seconds?
Our custom iron-on patches arrive with a heat-seal backing already applied, so you skip the fusible web and still get a clean, factory-finished edge.
Learn moreHow Do You Finish And Attach Homemade Patches To Clothing?
Trim the patch to its finished line, finish the edge, position it on a clean, dry garment, then sew or fuse it.
We've found that the merrowed border (the dense wrapped edge on a factory patch) is the one thing a home machine can't match, so we tell DIY makers to satin-stitch twice, the second pass a little wider.
Sew on synthetics and anything washed weekly. The University of Georgia's fiber chart says polyester and acrylic melt if too hot, nylon melts and fuses with heat, and cotton may scorch but doesn't melt, so a wool-setting fusible suits cotton and denim and risks a performance shirt. In our experience, fabric glue is the first of the three to let go in the wash.
We've found the home patch that fails first is the iron-on on a polyester shirt, while the stitched ones hold up. Work with us to create custom iron-on patches with the heat-seal backing already applied.
How Do You Apply Fusible Web To A Patch?
Apply fusible web in four steps, and follow the package for the setting, because brands differ. University of Missouri Extension's "Tips for Fusing" guide says to test on a swatch first.
- Cut the web to fit inside the patch edge. Trace the shape mirrored on the paper side and cut it about 1/8 in smaller than the patch.
- Press the adhesive side to the back of the patch. Utah State University Extension's Wonder-Under instructions say to press for 5 to 8 seconds with a hot, dry iron. Peel the paper once the patch is cool.
- Position the patch and press through a damp cloth. The same Utah State sheet calls for a firm 10 to 15 second press at the wool setting. Raise the iron rather than sliding it, as the Missouri guide directs.
- Cool before checking the bond. Lift one edge, and if it peels, press again briefly.
The Missouri guide advises against fusibles on acetate and pure silk, so sew those instead.
How Do You Make DIY Patches On Shirts And Jeans?
The garment decides patch weight, placement, attachment, and stitching. A knit shirt stretches under the hoop and relaxes afterward while the patch doesn't, so the shirt gathers unless something supports it.
For a lightweight or stretchy shirt, baste cut-away stabilizer (a firm backing that stays in after stitching) behind the area, skip the hoop, keep the patch to one layer under about 3 in, and sew it on. The NMSU guide says a stabilizer "helps to prevent puckering or bunching of stitches."
| Garment | Patch weight | Support behind | Needle | Attach by |
|---|---|---|---|---|
| Cotton T-shirt | Cotton or felt | Cut-away stabilizer | Ballpoint 70/10 to 90/14 | Sew |
| Polyester or performance shirt | Felt only | Stabilizer | Ballpoint | Sew |
| Sweatshirt fleece | Any home patch | None | Universal 90/14 | Sew or fuse |
| 12 to 14 oz denim | Twill or denim | None | Jeans 90/14 to 100/16 | Sew |
| Light denim or chambray | Cotton | Light interfacing | Universal 80/12 | Sew or fuse |
Decorative shirt patches sit on the chest or sleeve, away from neck ribbing and side seams. Repair patches on jeans go where the damage is, so cut them from denim or twill to take abrasion.
How Can I Make My Own Jean Patches?
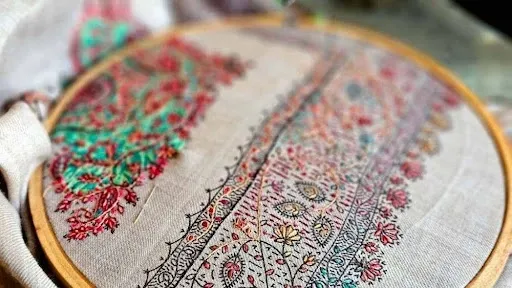
Make a jean patch from 12 to 14 oz denim or cotton twill so the repair wears at the leg's rate.
For repairs, cut the patch 1/2 to 1 in past the damage on every side, more on knees. Stitch through sound fabric, never along the hole's edge, inside for a hidden mend or outside for decoration.
Use a jeans needle: Schmetz's needle guide lists it as a medium ball point with a reinforced blade in sizes 70/10 to 110/18, and we'd pick 90/14 or 100/16 for the leg and 110/18 through seams. Our guide to sewing patches on denim covers attaching them, and our custom patches for jeans come on a twill base.
Looking for a patch tough enough for your jeans?
We make custom patches for jeans on a twill base with sew-on or iron-on backing, sized from 2 to 12 in, so knees and pockets get a patch that lasts.
How Do You Make Different Types Of Clothing Patches?
The patch material sets flexibility, texture, and durability. Felt is softest and needs no edge finish, woven fabric flexes most but frays, and printed artwork carries the most detail but fades before thread does.
- Felt - cut and layer, sew on
- Fabric - fusible web plus a satin-stitch edge
- Printed artwork - inkjet transfer paper or printable cotton, zigzag edge, sew-on
- Crochet - tight single crochet in cotton yarn, blocked flat, felt-backed, sew-on only
- Handwoven - card loom, a straight-stitch line across the warp before cutting, interfacing behind
Any regular sewing machine with a zigzag stitch handles every type here. You don't need an embroidery machine.
How Do You Make Felt Patches For Clothes?
Felt suits simple shapes because it is non-woven: the fibers are matted together, so a cut edge has no yarns to pull loose and needs no finishing.
Cut a base shape, then layer contrasting felt pieces into a recognizable motif. Add small details with extra felt and a few hand stitches.
Stop at two or three layers, since more makes the patch stiff on a knit. Acrylic craft felt melts if the iron is too hot, and the UGA chart says dry heat damages wool, so sew felt patches on. Our felt patches DIY guide covers the iron-on version.
Want a matching set for the whole team or crew?
With our custom wholesale patches, we make every piece from the same artwork in the same thread colors, with generous bulk discounts as quantities rise.
Get startedHow Do You Make Specialty Patches For Clothes?
A specialty patch does a job, such as reflecting light or coming off, and that job changes the construction more than the material does.
- Reflective - retroreflective tape or transfer film on a fabric base, stitched down
- Removable - hook-and-loop, soft loop side on the garment
- Raised - two or three felt layers cut in decreasing sizes, or a two-layer patch lightly stuffed before closing
Factory versions use 3D puff embroidery over foam and die-cut hook-and-loop fields, which a home setup can't match, so keep raised patches small.
How Do You Make Reflective Patches For Clothes?
Make a reflective patch from sew-on retroreflective tape or reflective heat-transfer film, cut with a craft knife and mounted on a contrasting fabric base. Retroreflective material sends light back toward its source.
Sew-on tape is the safer choice: zigzag it down rather than trusting adhesive. Heat-applied film needs a garment that tolerates heat, so check the fiber and use a pressing sheet.
A homemade reflective patch adds visibility but carries no safety certification. The ANSI/ISEA 107 standard for high-visibility safety apparel, as listed by CDC/NIOSH, specifies minimum amounts of background, retroreflective, and combined-performance material in three performance classes, so a patch on a hoodie doesn't make it hi-vis apparel. Our custom reflective patches do the same decorative job.
How Do You Make Several Matching Patches For Clothes?
Make matching patches from one master template and treat the job as repeatable stages: cut, decorate, stitch, finish. Trace every shape before cutting any, cut all patches from one fused sheet so color and grain match, and stitch all outlines in one thread color before switching.
Complete one sample first. It settles the stitch width and edge finish before you repeat a mistake across six patches.
Past roughly a dozen identical patches, a factory run keeps every piece identical without the repeat cutting. Custom Patch Factory (custompatchfactory.com) makes embroidered, woven, printed, PVC, leather, and chenille patches to order in 2 to 12 in sizes, with a free digital proof before production and a 5 to 7 business day turnaround after approval. Work with us to create custom wholesale patches with generous bulk discounts.
How Do You Keep Patch Shapes And Designs Consistent?
Reuse the same master template for every patch. We've seen matching sets drift by a quarter inch when the maker cuts without a template. The factory fix is a die, and the home fix is freezer paper ironed to the fabric.
Mark the design position and border allowance on the template so every motif sits in the same spot. Cut with a rotary cutter against the template.
Compare each finished patch to the approved sample before attaching any. Set aside any piece off by more than 1/8 in.
Frequently Asked Questions About How To Make Patches For Clothes
How Can You Make Patches For Clothes?
Cut a firmly woven cotton, denim, or felt base to a paper template, stitch or paint the design, and finish the edge with satin or blanket stitch. Sew it on for any garment, or fuse it with web on cotton or denim only, pressing by the package.
How Can You Design Your Own Patches For Clothes?
Sketch the design on paper at the finished size and cut it out as a template. Keep to one bold outline with one or two fill colors, hold letters above about 1/4 in tall, and add a 1/4 in margin for trimming and the edge finish.