How To Remove Embroidered Patches Easily Without Any Hassle
When you need to remove an embroidered patch from a piece of clothing or other apparel, your biggest fear may be that you will damage the fabric. But, with a little patience and the right technique, you can do it smoothly. In this post, we walk you through a step-by-step process of how to get embroidered patches off easily. Whether you’re updating your achievement patches, fixing a misplaced patch, or simply switching up your style, you’re in the right place. Discover the best methods and key tips to ensure a clean removal that prepares your garments for a fresh start.

Key Takeaways
- There are different methods for removing embroidered patches and iron-on patches - we cover them both here.
- Different fabrics have different needs, so pay attention to the fabric of your garment or other item.
- It may be possible to reuse a patch if you remove it carefully and it is still in good condition.
- Always use high-quality tools and work in a well-lit space. Use the appropriate method for removing the patch type and take your time with the process.
Special Considerations For Different Fabrics
When considering how to remove embroidered patches from different fabrics, it’s important to understand that they all have different properties. Be mindful of the considerations relating to your fabric to ensure you don’t damage it when removing the patch.
- Cotton: This is a relatively sturdy fabric, so careful use of a seam ripper or small scissors should be fine.
- Denim: Similar to cotton, this is a durable fabric that should be fine with a seam ripper.
- Wool: Be aware that wool garments are prone to unravelling. A seam ripper is preferable to scissors when removing embroidered patches from wool garments.
- Synthetic fabrics: These are relatively simple when it comes to using a seam ripper or scissors, but be mindful of their sensitivity to high heat if you are removing an iron-on patch.
- Silk and delicate fabrics: Take extreme care as you unpick stitches from these fabrics.
- Leather: Leather is another durable material so removing stitching shouldn’t be a problem. But it can be sensitive to adhesive residue, so take extra care to avoid harming the leather’s finish.
The best advice is to always pay attention to the care label of the fabric. If you have any uncertainty, always use the gentlest option available to you. We provide full guidance on what is safe for our custom patches, and most garments, bags, and other apparel will have their own instructions.

Removing Hand Embroidery From Shirt
Shirts are typically made from cotton or a cotton blend, though they can consist of more delicate fabrics. If you are looking up how to remove an embroidered patch from your shirt, you should take extra care not to damage the fabric or the patch. Make sure you have your tools to hand and that they are sharp and in good condition. Here are some other important considerations:
- Work in good lighting.
- Turn the shirt inside out to access the stitching at the rear of the patch.
- Use your seam ripper to carefully sever the stitches without harming the shirt fabric.
- If there are any visible holes in the shirt, consider patching them using thread of a matching color.
The key to removing embroidered patches from a shirt is care, precision, and patience. Take your time and use the right tools, and you should be able to achieve a good finish.
Removing Machine Embroidery From Jacket
Jackets can be made from a wide range of materials, and each material requires slightly different considerations for an optimal result when removing an embroidered patch. For example, cotton and denim jackets are quite rugged and won’t damage easily, while suede jackets are more prone to damage if you are careless when removing the patch.
Again, make sure your tools are sharp, and take your time with the job whilst paying attention to the following considerations:
- Make sure you work in a well-lit space.
- Turn the jacket inside out.
- Start with a seam ripper, then use scissors and tweezers for loose threads.
- Clean and freshen the jacket after removing the patch.
As you can see, the considerations are similar. We provide custom patches for jackets of all types, optimized for attachment to common jacket materials. Reach out to us if you need any advice choosing a new patch for your specific jacket and we can recommend some products for you to make your own personalized design.
Handling Modern Patch Adhesives And Advanced Fabrics
In recent years, there have been advancements in patch adhesives and fabric technology, and this introduces new challenges and opportunities for patch removal. Many modern iron-on patches now use stronger, heat-activated adhesives that may require slightly higher temperatures or repeated heating cycles for clean removal. This makes it important to check the garment care instructions first for heat tolerance.
If you have garments made from performance or stretch fabrics like spandex or nylon blends, you should exercise caution. Common examples include activewear blends or technical materials.
These fabrics are sensitive to both heat and mechanical stress. When removing patches from these materials, apply the following:
- Use minimal heat.
- Be gentle when working with seam rippers or adhesive removers.
- Avoid stretching the fabric wheil peeling off patches as this can distort the garment’s shape.
It’s worth noting that some patches now feature peel and stick backing or Velcro attachments. These patches are easy to apply and remove without heat or stitching. If your patch uses this kind of technology, removal is as straightforward as gently lifting the patch and cleaning the surface beneath if needed. This enables you to make garment refresh quicker and easier than ever.
Looking for removable custom embroidered patches?
If you want custom embroidered patches that are no trouble to remove at all, design with us and choose a Velcro or safety pin backing for maximum flexibility.
Can Patches Be Removed And Reused?
If you want to reuse a patch after you have removed it, there are two prominent things that will affect whether this is possible:
- How well did you look after the patch during its time on the current garment?
- How will you remove the embroidered patch to avoid damaging it?
If you already have an idea of where you want to reuse your patch, such as attaching your custom patch to a hat, storage may not be a consideration. All you need to know is how to get embroidered patches off safely, and we have provided a method for this. Follow the steps in this guide and you should be able to remove your embroidered patch without damaging it.
The factors that determine its reusability, therefore, are:
- Its attachment method: It may be harder to reuse an iron-on patch.
- The patch material: Some patch materials are more durable than others.
- Patch condition: If it is damaged, frayed, or faded, the patch may not be suitable for reuse.
- Exposure to the elements: Environmental factors like sunlight, humidity and temperature fluctuations can impact patch condition. This is why it’s important to store your patch correctly after removal if you don’t reattach it straight away.
Once you have successfully removed your patch, store it flat in a cool, dry place away from direct sunlight to preserve its condition. This way, when you are ready to reattach it, it will still look its best.

Things To Take Care Of While Removing The Embroidered Patches
Now you know how to remove embroidered patches safely from your garments, and even some tips to reuse those patches if you want to. But here are a few final things to take care of when removing your patches to ensure optimal results every time:
- Determine the attachment method: You need to know the appropriate patch removal method, and this is determined by the way the patch is attached.
- Consider the fabric type: Your garment is made from a certain fabric that has its own needs, so consider those carefully.
- Use the right tools: Prepare your tools beforehand and make sure they are in good condition.
- Work in good lighting: When you are unpicking small stitches, you need good lighting in order to be precise.
- Don’t rush: Patience and precision are key to unpick stitches without doing any damage.
Try to keep all these things in mind as you go about the process of how to remove embroidered patches.
Add an embroidered name patch to apparel or accessories
Our custom embroidered name patches can be personalized for your needs and you can choose an attachment method that won’t be difficult to remove later.
Create yours hereHow To Remove Embroidered Patches
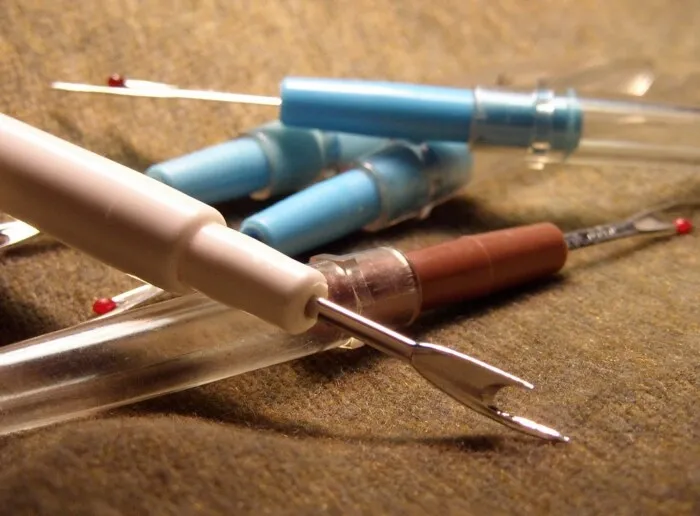
When it comes to the question of how to remove embroidered patches, the basic gist of the answer amounts to this: ‘Very carefully’. You will need a seam ripper or a pair of very small scissors, and you will need some tweezers.
Your goal will be to carefully unpick each stitch that holds the patch in place until it all comes loose, then carefully pull the threads out and eventually remove the patch. Below, we will also look at how to remove custom iron-on patches for your convenience.

Steps For Removing A Sewn-On Patch
The first step in the process of how to remove an embroidery patch is to assess it and determine exactly how it’s attached. Unless you already know, it’s important not to simply assume it is sewn on. Some patches are adhesive backed, and it takes a completely different removal method to take these off.
Check for stitching around the edge of the patch; once you confirm that it is sewn on, the removal process is as follows.
- Turn the garment or other item inside out: You want to get at the stitching at the rear of the custom embroidered patch. The thread here will be easier to unpick, and you won’t risk damaging the patch as you do it.
- Unpick the stitches: Once you find the stitching on the inside of your garment or other item, you need to start cutting them. Your seam ripper is ideal for this, as you can simply push the sharp point under each stitch and cut it. But a pair of small scissors can also be used. Take great care not to pierce or cut the fabric of your garment.
- Remove remaining threads: After a while, you will notice that the thread holding the patch in place starts to come loose. At this point, you may be able to simply pull the remaining thread with your fingers or a pair of tweezers. Make sure you remove every bit of thread from the garment and your patch will lift off, leaving an empty space where it used to be.
- Check the area: You may need to trim some of the excess threads to remove them completely. Make sure there are no remaining loose threads and that you smooth out the area completely. If there is any damage to the fabric, consider patching it up or sewing it back together. This will require some sewing skill, or you may need to seek professional help.
This is how to remove embroidered patches the right way. Whether you made your own custom embroidered patches or had them professionally made by us, the key is to have patience and be meticulous in your approach. This will ensure you get a good result, preserving both the patch itself and the fabric of your garment.
What To Do If The Patch Is Ironed On
If, when you assess the patch, you discover that it is actually ironed on, the process of removing it is a little different. We supply custom wholesale patches with an iron-on application because they are convenient and versatile, but the time may come that you need to replace yours.
If you find that you have an iron-on patch in place on your garment, here is how to remove it safely.
- Place a piece of thin cloth over the patch: You are going to need to apply heat to the patch to soften the adhesive and make it easier to remove. This cloth will protect the patch and your garment from direct exposure to that heat, helping prevent damage.
- Use a warm iron to heat the patch: Set the iron temperature based on the instructions for the fabric of your garment - this information should be on the care label. Avoid using a heat setting that exceeds the maximum safe level for the fabric, and make sure the steam setting is switched off. You should apply the heat for 20-30 seconds to loosen the adhesive.
- Peel the patch off: While it is still warm, you need to slowly and gently peel the patch off. It is wise to use tweezers to do this as it may be too hot to handle directly. If you can’t remove the patch, try heating it a little longer to further soften the glue. Do not rush this process or you could damage your garment.
- Remove residue: There is likely to be some adhesive left on the surface of the fabric. Use a little rubbing alcohol or a commercial adhesive remover to get it off - make sure you test it first on an inconspicuous piece of the fabric. Rub gently until the residue is removed, then wash and dry the garment to ensure it is completely clean.
Again, it is important to take your time with this process to remove the patches safely. If you rush it, you risk damaging the patch, the fabric, or both. Take your time and take care, and you will have your garment ready for a new patch before you know it.
Our custom patches are available with diverse customization options so you can create your new patches to replace the old with endless possibilities.
Frequently Asked Questions About How To Remove Embroidered Patches
Can Patches Be Removed And Reused?
Yes they can, if the patch is in good condition and you remove it carefully. If a patch is damaged or soiled, it may not be suitable for reuse.
Things To Take Care Of While Removing The Embroidered Patches
The key is to be patient and take care. Use high-quality tools and work in a well-lit environment. Check the attachment method and be mindful of the needs of the fabric.