Hat Patch Designs: Which Ideas Will Make Your Custom Hat Stand Out?
A hat front is about the size of an index card, and most logos were never drawn for it. Shrink a full logo onto a cap and the tagline turns to fuzz. In this guide, we cover the hat patch designs that read at arm's length and the material, size, finish, and backing that get each one onto the hat.

Key Takeaways
- Four design families carry most hat patches: an equipment icon, coordinates, a monogram, or an icon with a few words.
- Material follows the artwork: embroidery for bold shapes, woven for fine text, PVC for outdoor wear, leather for a one-tone logo.
- Size follows the hat: start at 4 in wide × 2.5 in high on a trucker or structured cap, smaller on a dad hat or beanie.
- We supply high-quality custom patches for hats that you can personalize with your own logo, text, colors, shape, and backing at a price that works for you.
Table of contents
-
What Are Hat Patch Designs?
-
Which Types Of Patches And Materials Suit Your Hat Patch Design?
-
How Do You Choose The Right Size For Your Hat Patch Design?
-
How Do You Turn Your Logo Into A Leather Patch Design?
-
Which Finish And Hat Suit Each Hat Patch Design?
-
How Do You Select Your Hat Patch Backing And Application Method?
-
Which Hat Patch Design Should You Start With?
-
How Should You Prepare Hat Patch Artwork For Production?
What Are Hat Patch Designs?
A hat patch design is the combination of artwork, patch material, size and shape, finish, and backing chosen for a patch on a hat's front panel, and the ideas that read best at arm's length are a simplified icon, a monogram, a set of coordinates, or an icon with a few words.
An equipment icon marks a trade, coordinates mark a place, a monogram marks a person, and icon plus short text carries a brand name.
Readability, hat space, material, and use decide which fits. Choose one dominant element, print it at 100 percent, and simplify what you can't read. Our guide to hat patch ideas covers themed ideas beyond these four.
How Can You Use A Construction Equipment Icon On A Patch?
Use the silhouette, not the machine. An excavator arm, a crane boom, or a bulldozer blade reads as a flat shape at 2 in wide; the hydraulics and cab windows don't.
Strip the drawing to one line weight and close every gap under 1 mm, which gives a one-color deboss or engraving on leather or a two-color embroidery. Pair it with a one- or two-word company name in a bold font.
Which Types Of Patches And Materials Suit Your Hat Patch Design?
Pick the material by what the artwork needs: embroidery for bold shapes in one to four colors, woven for fine text and coordinates, printed for photos and gradients, PVC for outdoor and work hats, and leather (engraved or debossed) for a simple logo or monogram.
| Material | Texture | Detail it holds | Flexes on a curve | Finish | Pick it for |
|---|---|---|---|---|---|
| Embroidered | Raised thread | Bold shapes, 1-4 colors | Yes | Flat or 3D puff | Icon plus name |
| Woven | Flat thread | Small text, thin lines | Yes | Merrowed edge | Coordinates, taglines |
| Printed (including sublimated) | Smooth fabric | Photos, gradients | Yes | Full color | Shaded art |
| PVC | Soft rubber | 2D or 3D layers | Some | Molded color | Work and outdoor hats |
| Genuine leather | Natural grain | One-tone marks | Stiff | Engrave, deboss | Logo, monogram |
| PU (faux) leather | Uniform surface | Crisp one-tone marks | Semi-stiff | Deboss, hot-foil | Budget leather look |
Material, shape, and attachment are three separate decisions.
Work with us to create custom patch hats. Custom Patch Factory (custompatchfactory.com) makes embroidered, woven, printed, PVC, leather, and chenille patches in 2-12 in sizes, with a free digital proof and 5-7 business days after approval.
When Should You Choose Custom Leather Patch Hats?
Choose leather when the design is a simple logo, bold lettering, or understated branding in one tone.
The Etherington and Roberts bookbinding dictionary defines embossed material as carrying a raised or depressed design. In patch work, embossed means raised and debossed means pressed down with a heated die, and the "embossed" patch hats we've seen are usually debossed.
Engraving is a burn, not a depth. A 2023 study in Materials found that laser-machined leather edges produce carbon and that a higher duty cycle increases carbonization, so a darker engraving means more power.
Stanford's laser lab approves vegetable-tanned leather and classes chrome-tanned and artificial leather as hazardous, so PU leather is debossed or printed instead.
Natural grain varies hide to hide, so we proof custom leather patches at size and the proof shows whether hide or PU suits your artwork.
Want a hat patch that reads from across the room?
Work with us to create custom patch hats with your icon, monogram, or coordinates in the material and size that fit your hat.
How Do You Choose The Right Size For Your Hat Patch Design?
Measure the usable front panel first: a hat front is a landscape space. Measure between the side seams, below the eyelets, and above the brim seam, noting the center seam and the curve.
Typical usable fronts from our bench: structured 6-panel and snapback 4.5-5.5 in wide × 2.75-3.25 in tall with a center seam; trucker foam or fabric front 5-6 × 3-3.5 in, flat, no center seam.
Our working reference for a large patch is 4 in wide × 2.5 in high on a trucker, 5-panel, or structured front. The compact range of 2-3 in wide × 1.5-2.5 in high fits every hat type, and 2 in is the smallest size for a detailed logo.
The Federal Highway Administration's 2015 legibility report estimates about 30 ft per inch of letter height, so 1/4 in letters read at about 7 ft. No one size fits every hat, so tape a full-size paper mockup to the actual hat, then check our patch sizes chart.
What Shape Should A Leather Patch Be?
Pick the shape by text length: a long name or a coordinates line suits a wide rectangle or oval, while a monogram or a centered icon suits a compact circle or rounded square.
Keep the proportions when you scale: a 4 × 2.5 in patch has a ratio of 0.625, so at 3 in wide (factor 0.75) it becomes 1.875 in tall, and at 2 in tall (factor 0.8) it becomes 3.2 in wide.
Leave space between artwork and edge: a merrowed border (the wrapped thread edge) takes about 1/8 in per side.
Get a debossed or engraved leather patch for your brand
Our custom leather patches take a simple logo or bold lettering, engraved or debossed, and we proof every one at actual size before production.
Learn moreHow Do You Turn Your Logo Into A Leather Patch Design?
Simplify the logo for one process before you touch the size:
- Pick the process: a burned tone (engraving) on veg-tan, or a pressed impression (deboss) on genuine or PU leather.
- Flatten the color into one tone or one impression.
- Thicken the strokes to 0.8-1 mm so the deboss die doesn't tear the grain.
- Open the spacing, since touching letters merge in leather.
- Drop anything under 1/4 in, then review the production proof at actual size before approval.
Work with us to create custom brand logo iron-on patches. We convert your logo for the process and send a free proof at size.
Can I Use My Full Logo On A Leather Patch?
Usually not at hat size. It depends on the logo's complexity, the patch dimensions, and the production method.
Small taglines under 1/4 in turn into a smudge, detailed illustrations lose their inner lines to the die or burn, and tightly spaced elements merge into one blob.
We've seen more leather-patch proofs fail on a tagline under a quarter inch than on the logo itself, so ask for a simplified variation: the icon alone, or icon plus wordmark.
Which Finish And Hat Suit Each Hat Patch Design?
Match the finish to the design's texture, contrast, and detail, then match the patch to the hat's front area and surface: a one-tone mark suits debossed leather, and a bold icon suits embroidery.
- Structured cap: stiff front, takes a rigid leather patch.
- Unstructured cap: soft front, wants a small flexible patch.
- Trucker: flat front, no center seam, biggest area.
- Beanie: stretchy cuff, wants a small sewn patch.
Hat color, seams, curvature, and fabric flexibility change the result: tan leather disappears on khaki and pops on navy, and a seam ridge under a stiff patch shows as a bump. The same 4 × 2.5 in leather patch looks bold on a trucker and crowded on a dad hat, so check it on the hat style you'll order.
How Does Hat Type Affect The Appearance Of A Patch Design?
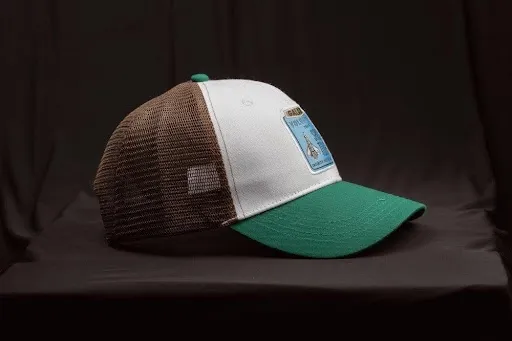
A structured front panel holds a patch flat, while an unstructured one folds around it. Structured caps carry buckram (a stiff, starch-sized cotton or linen) behind the front two panels.
On a six-panel cap the front panels meet at a center seam, so a patch wider than about 4 in bridges two curved panels and the ridge. Trucker and 5-panel fronts have no center seam.
We've found the hat-patch orders that come back for a second size were proofed on a trucker and worn on a dad hat, so try the paper mockup on the exact hat style first.
Need patches your crew can swap between caps?
Custom Velcro hat patches let a work or tactical crew move one design between hats, with hook-and-loop backing sized to the patch.
How Do You Select Your Hat Patch Backing And Application Method?
Select the backing by hat fabric, patch material, and the equipment you own: heat-seal for twill and foam fronts with a cap press, sew-on for leather, beanies, and mesh, and hook-and-loop for designs you'll swap.
Decide permanent or removable before you order. Hook-and-loop adds a layer and needs a loop field 1/8-1/4 in larger than the patch, and our custom Velcro hat patches come with the hook-and-loop backing built in.
Sew-on needs at least 1/4 in of clearance from seams and the sweatband, and heat-seal needs at least 3/8 in from the brim seam. Confirm the backing before ordering.
When Should You Use Iron-On Or Heat-Seal Backing?
Use heat-seal when the hat front is flat cotton or polyester twill or foam and you can press it evenly. The hot-melt film needs the right temperature, pressure, and time together.
Household irons are flat, so they touch a round crown at one spot and leave the edges unbonded. A cap press has a curved platen that presses the whole patch at once.
Use a household iron only when the instructions that ship with the patches allow it, test on a scrap, press straight down without sliding, and let the hat cool. Read how to put a patch on a hat first.
Outfitting a whole team, shop, or event with patch hats?
Our custom wholesale patches keep one design consistent across every hat in the order, with generous bulk discounts and a free digital proof.
Get startedWhich Hat Patch Design Should You Start With?
Start with the family that matches the patch's purpose: an equipment icon for workwear, coordinates for a place, a monogram for a person, and an icon plus tagline for a business. The concept that communicates with the fewest elements wins.
| Purpose | Idea | Material and finish | Starting size | Shape |
|---|---|---|---|---|
| Business branding | Icon plus name | Debossed leather, embroidery | 4 × 2.5 in | Rounded rectangle |
| Personal identity | 2-3 letter monogram | Leather or heavy embroidery | 2.5-3 in | Circle or rounded square |
| Location | Coordinates | Woven or engraved leather | 4 × 1.5 in | Wide rectangle |
| Workwear | Equipment icon | PVC, hook-and-loop | 3 × 2 in | Rectangle or shield |
Write coordinates in degrees and minutes with the N, S, E, or W letter. We've found a coordinates patch reads best when it stops at minutes, on custom woven patches or engraved leather.
Mock up two concepts at full size on the hat and keep the one you read first.
What Should You Know About Leather Patch Color And Text?
Color and lettering options depend on the material, finish, equipment, and manufacturer. Engraving gives brown-to-black tones, a deboss gives shadow, and added color comes from a foil or paint fill inside a deboss.
Small lettering needs weight, spacing, and contrast. The University at Buffalo's embroidery guidelines set a 1/4 in cap height for a name line and a 3 in minimum logo width on a hat. Our floors are 0.25 in (6 mm) letters with 1 mm strokes.
Work with us to create custom leather name patches in genuine or PU leather, and request a proof whenever precise color or small text matters.
How Should You Prepare Hat Patch Artwork For Production?
Send clean artwork at the final size and the patch comes back looking like the file. The University of North Texas print service explains that a raster image is a grid of pixels that breaks up when enlarged, while a vector file has no upper or lower limit for sizing.
So a vector logo scales cleanly and a raster image must be built at the output size. Start in any vector tool, and trace any AI sketch to vector, since AI output is raster.
Confirm the accepted formats, dimensions, fonts, and minimum line thicknesses with your maker before you submit.

How Should You Prepare Vector Art For Production?
Draw the artwork as closed shapes with clean paths and delete stray points and any effect a die or needle can't reproduce.
Export in a format your manufacturer accepts, such as SVG or AI, at the patch's real dimensions, and convert fonts to outlines so the maker's computer can't swap your typeface.
Check the minimum line thickness: 1 mm for embroidery, 0.5 mm for woven, 0.8-1 mm for a deboss die, and no text under 0.2 in tall. Send us the file and we'll return a free proof at size.
Frequently Asked Questions About Hat Patch Designs
What Types Of Designs Can You Use For Hat Patches?
The four designs that read best on a hat are an equipment icon for a trade, coordinates for a place, a two- or three-letter monogram, and an icon with a short name.
Which Patch Types And Materials Work Best For Your Hat Patch Design?
Pick the material by the artwork: embroidery for bold shapes, woven for fine text and coordinates, printed for photos, PVC for outdoor and work hats, and leather, engraved or debossed, for a one-tone logo or monogram.